

Hello, team. Adam Steele here.
If you have ever walked into a commercial gym on a Monday, you know exactly what everyone is doing: chest. But if you want a physique that truly stands out one that screams power, posture, and athletic capability you need to turn around and look at what’s behind you. I’m talking about your back.
For years, I’ve told my clients that a strong back is the foundation of a functional body. When you pair that with the biceps, you create a synergy that is hard to beat. You don’t need a garage full of machines or a monthly membership to build this. All you really need is a pair of dumbbells and the will to work.
In this guide, I am going to walk you through a dumbbell back and bicep workout designed specifically for beginners who are ready to get serious. We are going to focus on form, muscle engagement, and the specific mechanics that drive growth. This isn’t just about moving weight from point A to point B; it is about mastering your pull day routine.
Let’s get to work.
Why Back and Biceps? Understanding the Pull Muscle Synergy
You might be wondering why we pair these two muscle groups together. In the fitness world, we often categorize movements into “push” and “pull.”
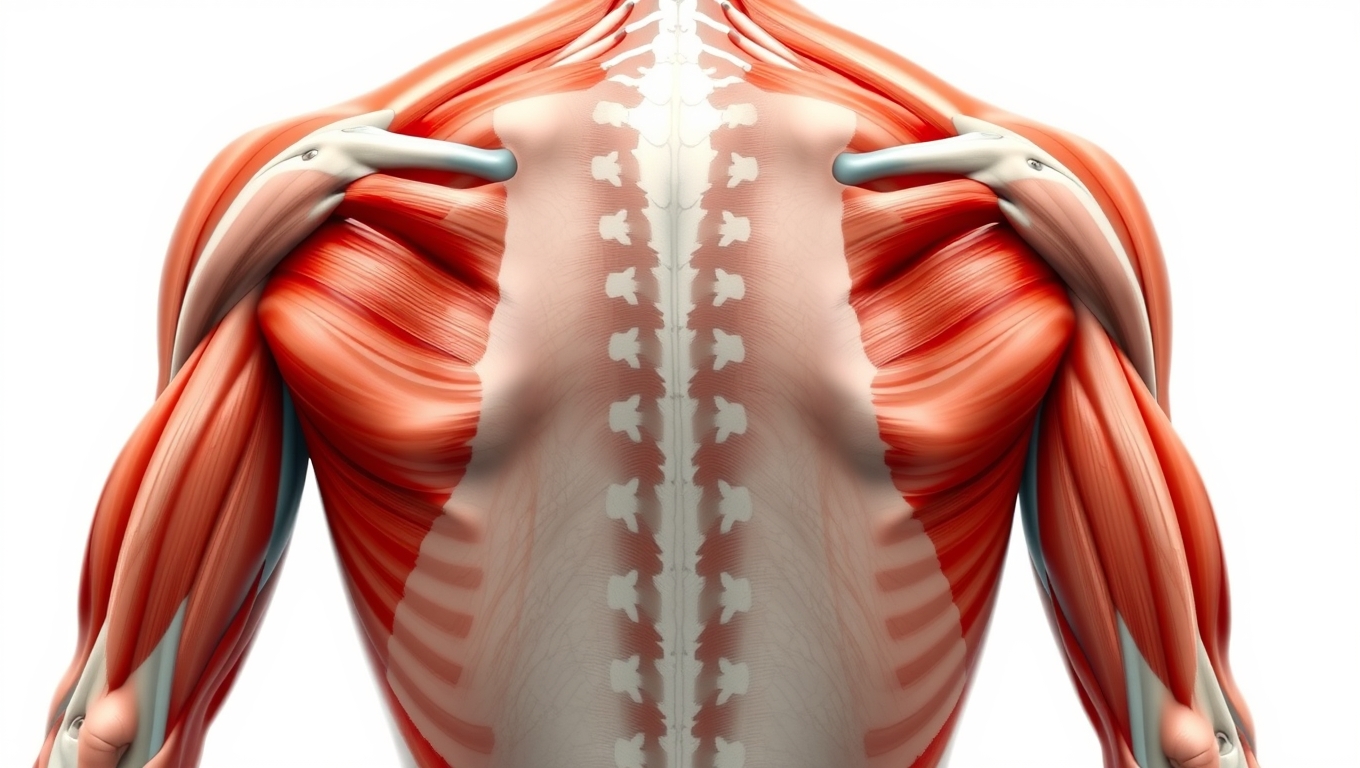
Your back muscles (the latissimus dorsi, rhomboids, trapezius, and rear delts) are your primary “pulling” muscles. They handle the heavy lifting when you row a boat, pull a door open, or lift something off the ground. However, biomechanically, your biceps act as the secondary mover in almost every compound back exercise.
When you perform a row, your back does the heavy lifting, but your biceps assist by flexing the elbow. By combining them into a single session, you are efficiently pre-exhausting the biceps during your heavy back movements and then finishing them off with isolation work. This makes for a highly efficient workout structure.
Many beginners make the mistake of training back one day and biceps the next. The problem there is that your biceps are likely already fatigued from the back day, leading to subpar performance. Grouping them allows for full recovery before you hit your next pull day routine.
Essential Gear and Setting Up Your Home Gym Space
One of the reasons I love this workout is its simplicity. You do not need cables, lat pulldown machines, or T-bar row stations. However, you do need the right tools to get the most out of this dumbbell back and bicep workout.
Here is what I recommend for your home setup:
- Adjustable Dumbbells: These are a game changer. As you get stronger (and you will, quickly), you need the ability to increase the weight. Fixed dumbbells are great, but they take up space. An adjustable set allows you to implement progressive overload without clutter.
- A Sturdy Bench: While you can do many of these moves standing or using a sturdy chair, an adjustable weight bench allows for better angles, such as chest supported rows or incline curls.
- Grip Support (Optional): As you start lifting heavier on your back exercises, you might find your grip fails before your back does. A simple pair of wrist straps can help you focus on the back muscles rather than your forearm endurance.
Clear a space in your living room or garage. You need enough room to extend your arms fully without knocking over a lamp. Your environment dictates your focus, so keep it clear of distractions.
The Importance of a Dynamic Warm Up for Upper Body Training
I cannot stress this enough: do not pick up a heavy weight cold. Think of your muscles like a rubber band. If you pull a cold rubber band, it snaps. If you warm it up, it stretches.
Before we touch the iron, we need to get blood flowing to the shoulder girdle and elbows. Since we are doing a heavy pull day routine, we need to mobilize the thoracic spine and the rotator cuffs.
Spend 5 minutes doing the following:
- Arm Circles: 30 seconds forward, 30 seconds backward.
- Band Pull Aparts (or mimic the motion without a band): Squeeze your shoulder blades together.
- Torso Twists: Loosen up the spine.
- Light Dumbbell Deadlifts: Use very light weight to wake up the hamstrings and lower back.
The Beginner Friendly Dumbbell Back and Bicep Workout Routine
Here is the plan. We are starting with compound movements (multi-joint exercises) for the back because these require the most energy and recruit the most muscle mass. We will finish with isolation movements for the biceps.
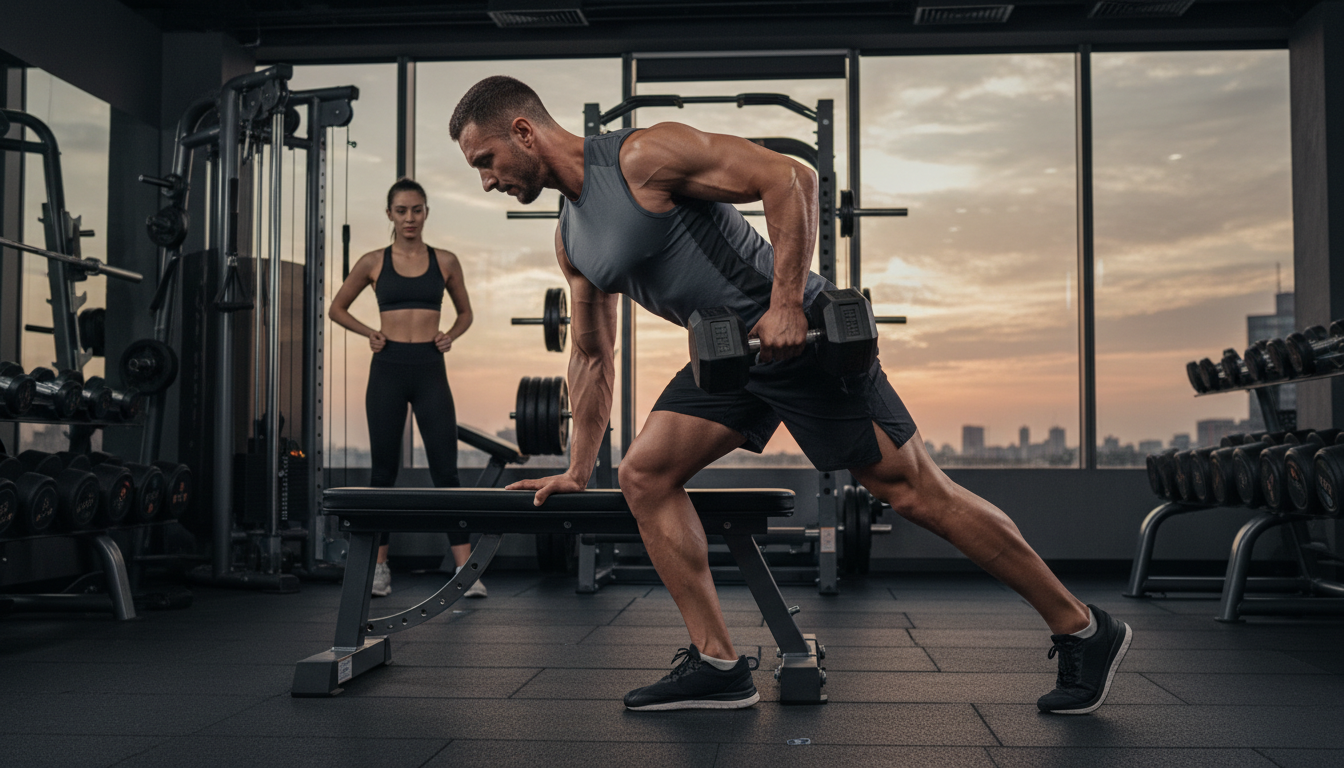
Dumbbell Exercise 1: Single Arm Dumbbell Row (The Foundation)
This is the king of dumbbell back exercises. It targets the lats effectively and allows you to isolate one side at a time, fixing any muscle imbalances you might have.
How to do it:
- Place your left knee and left hand on a bench (or a sturdy chair) for support. Your back should be flat, almost parallel to the ground.
- Hold the dumbbell in your right hand with a neutral grip (palm facing your body).
- The Cue: Imagine there is a string attached to your elbow. Pull your elbow back towards your hip, grazing your ribcage.
- Squeeze your back muscle at the top, then slowly lower the weight for a count of 3 seconds.
Adam’s Tip: Do not use momentum to jerk the weight up. If you have to twist your torso to get the weight up, it’s too heavy. Keep your shoulders square to the floor.
Dumbbell Exercise 2: Bent Over Wide Row (Targeting the Upper Back)
While the single arm row hits the lats (the width of your back), the wide row targets the rhomboids and rear delts (the thickness of your upper back). This is crucial for posture.
How to do it:
- Stand with feet shoulder width apart, holding a dumbbell in each hand.
- Hinge at the hips, pushing your glutes back until your torso is at a 45 degree angle. Keep your core tight to protect your lower back.
- Turn your palms to face your thighs (pronated grip).
- Pull the dumbbells up towards your chest, flaring your elbows out wide to the sides.
- Squeeze your shoulder blades together at the top, as if you are trying to crack a walnut between them.
Dumbbell Exercise 3: Dumbbell Romanian Deadlifts for Posterior Strength
We cannot neglect the lower back and the posterior chain. This movement ties the whole back together and builds a foundation of strength.
How to do it:
- Stand tall with dumbbells in front of your thighs, palms facing your legs.
- Keep a slight bend in your knees this is not a squat.
- Push your hips backward as if you are trying to close a car door with your butt.
- Lower the weights along your shins until you feel a deep stretch in your hamstrings. Keep your back perfectly straight.
- Drive your hips forward to return to the standing position, squeezing your glutes.
Adam’s Tip: The range of motion depends on your flexibility. If your back starts to round, you have gone too low.
Dumbbell Exercise 4: Alternating Dumbbell Bicep Curls
Now that we have crushed the back, we move to the biceps. By now, your arms should already feel pumped from the rows. This is where we initiate the specific back and bi exercises for peak development.
How to do it:
- Stand tall, core braced, dumbbells by your sides.
- Curl one weight up towards your shoulder.
- The Secret Sauce: As you curl up, twist your pinky finger upward (supination). This twisting motion fully engages the biceps brachii.
- Squeeze hard at the top, lower slowly, and switch arms.

Dumbbell Exercise 5: Hammer Curls for Forearm and Bicep Thickness
To get arms that look thick from the front, you need to target the brachialis (a muscle that sits under the bicep) and the brachioradialis (forearm).
How to do it:
- Hold the dumbbells with a neutral grip (palms facing each other) throughout the entire movement.
- Curl the weights up towards your shoulders without twisting your wrist. It should look like you are swinging a hammer.
- Keep your elbows pinned to your sides. Do not let them drift forward.
Dumbbell Exercise 6: Concentration Curls for That Bicep Peak
We finish with an isolation movement to empty the tank.
How to do it:
- Sit on the edge of your bench. Spread your legs wide.
- Place the back of your right arm against the inside of your right thigh.
- Curl the weight up, focusing purely on the bicep contraction. Your leg prevents you from cheating.
- Lower fully and repeat.
Structuring Your Sets, Reps, and Rest for Maximum Growth
The exercises alone aren’t enough; the programming is what creates the change. For this dumbbell back and bicep workout, I want you to focus on hypertrophy (muscle growth) ranges.
- Compound Back Movements (Rows, Deadlifts): 3 Sets of 8–12 Reps.
- Why? These are taxing movements. We want strength and size.
- Isolation Bicep Movements (Curls): 3 Sets of 12–15 Reps.
- Why? Biceps respond well to metabolic stress and higher volume.
Rest Periods:
Rest is when your ATP (energy) stores replenish.
- Take 60 to 90 seconds between sets of back exercises.
- Take 45 to 60 seconds between sets of bicep exercises.
If you are breezing through these sets, the weight is too light. The last 2 reps of every set should feel difficult you should be able to complete them, but it should take real effort.
Common Beginner Mistakes to Avoid During Your Arm and Back Workout
I have seen it all in my years of coaching. When beginners jump into an arm and back workout, they often fall into traps that kill their gains or, worse, cause injury. Let’s avoid these.
1. Rounding the Back:
This is the cardinal sin of lifting. Whether you are rowing or deadlifting, a rounded spine places immense pressure on your vertebrae. Keep your chest up and your spine neutral. If you can’t keep it straight, lower the weight.
2. Using Momentum (The Swing):
We call this “ego lifting.” Swinging your hips to curl a dumbbell might move the weight, but it takes the tension off the bicep. Tension is what builds muscle. Control the eccentric (lowering) phase of every lift. That is where the magic happens.
3. Ignoring the Grip:
On pull days, your forearms will burn. Don’t let your grip determine your back workout. If your hands give out before your lats do, use wrist straps or work on your grip strength separately.
Progressive Overload: How to Keep Seeing Results With Your Upper Body Split
You have mastered the form. You are feeling the burn. Now, how do we ensure you don’t plateau? You need to apply progressive overload to your upper body split.
Progressive overload doesn’t just mean adding more weight, although that is one method. Since you might have limited dumbbells at home, you can progress in other ways:
- Increase Reps: If you hit 3 sets of 10 easily, go for 3 sets of 12 next week.
- Decrease Rest: Cut your rest from 60 seconds to 45 seconds to increase metabolic demand.
- Improve Tempo: Slow down. Take 4 seconds to lower the weight. This increases “Time Under Tension” and makes the same weight feel much heavier.
- Perfect Form: Sometimes, making an exercise harder simply means doing it with stricter form.
Consistency in your pull day routine combined with these progression methods is the mathematical formula for a bigger back and arms.
Cool Down and Recovery: Stretching Your Back and Bis
You’ve done the hard work. Now, let’s jumpstart the recovery process. A proper cool down brings your heart rate down and prevents excessive stiffness.
Hold each of these stretches for 30–60 seconds:
- Child’s Pose: A yoga classic that is incredible for the lats and lower back.
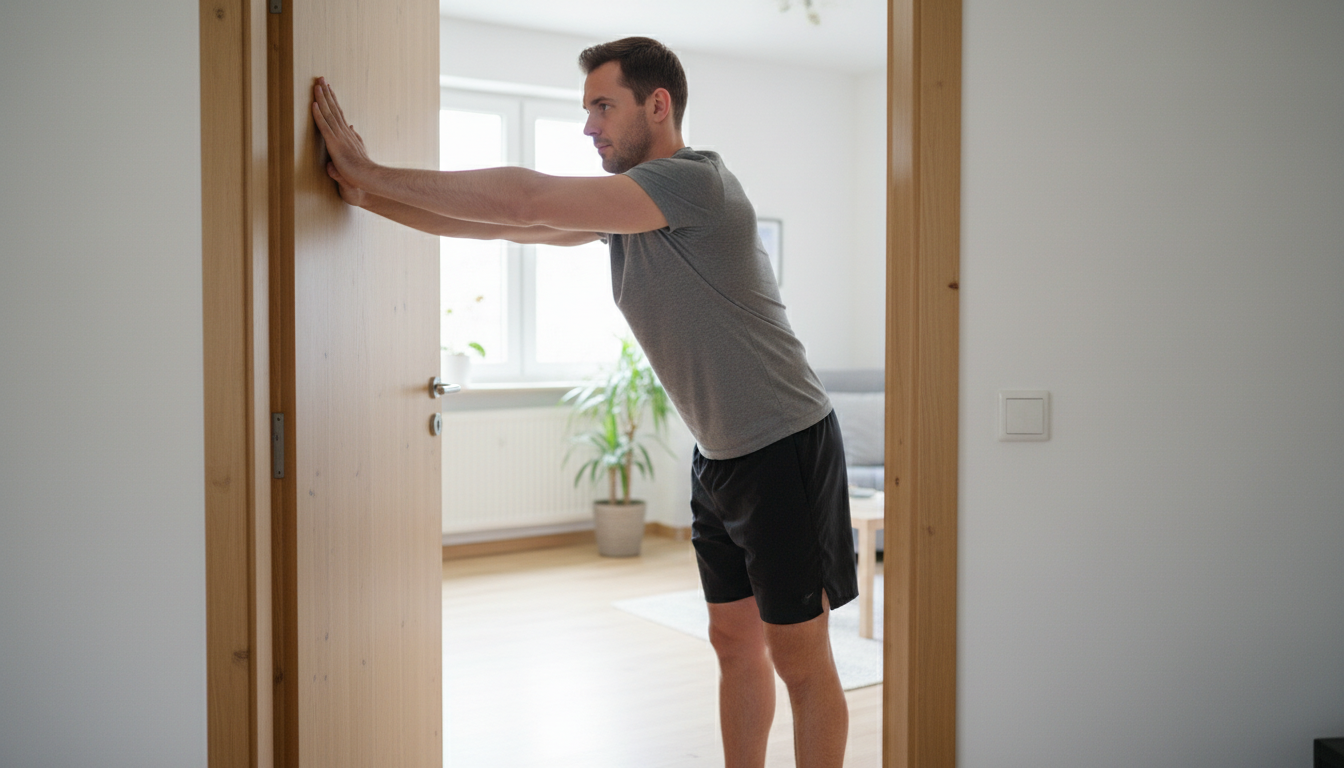
- Doorway Chest and Bicep Stretch: Stand in a doorway, hold the frame with one hand, and gently turn your body away until you feel a stretch in the bicep and shoulder.
- Cat-Cow: On hands and knees, arch your back up and then sink it down to mobilize the spine.
Nutrition is the other half of recovery. Ensure you are consuming adequate protein within a few hours of training to repair the muscle fibers you just tore down.
Conclusion: Staying Consistent on Your Fitness Journey
Building a strong, defined back and peak biceps doesn’t happen overnight. It happens on the days you don’t feel like training but do it anyway. It happens in that last rep when your muscles are screaming, and you decide to push through.
This dumbbell back and bicep workout is your toolkit. It is simple, effective, and time efficient. You have the back and bi exercises, the rep schemes, and the knowledge to execute them safely.
Remember, fitness is a marathon, not a sprint. Trust the process, track your weights, and focus on getting 1% better every single session.
Now, go pick up those dumbbells and build the back you deserve.
I’m rooting for you.
Coach Adam